Steps for Replicating a Table Using Refresh
|
Set up database connections>Create a target table>Define the Replication>Run the Replication |
A refresh is a one time complete replication from source to target table, according to replication settings and scripts. You can control the timing of the replication, identify the columns to be replicated and add scripts to transform data during replication. The source and target databases can be on the same or different database servers and platforms. For example, you can replicate an IBM Db2 for i table to an Oracle database or a Microsoft SQL Server table to Db2 for i.
1. Set Up Database Connections
-
Make sure you have database connections via a .NET data provider to the supported databases for source database tables and target database tables.
-
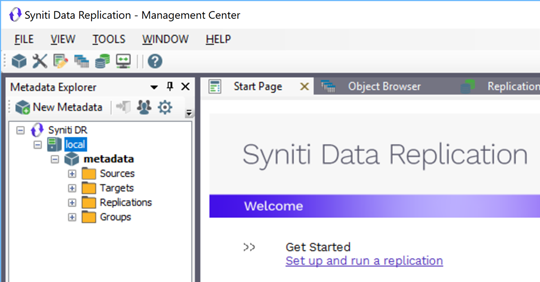
Start the Management Center.
A default database (Microsoft SQL Server CE) is provided for your metadata, to contain all the information needed for your replication setup.
-
In the Metadata Explorer, expand the metadata node to view the Sources and Targets nodes.
-
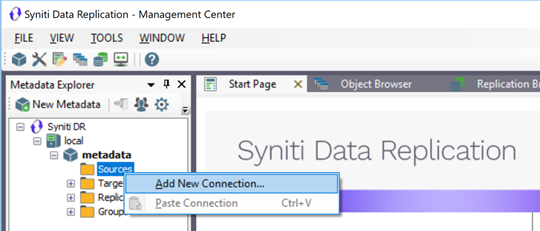
Select the Sources node.
-
From the right mouse button menu, choose Add New Connection.

-
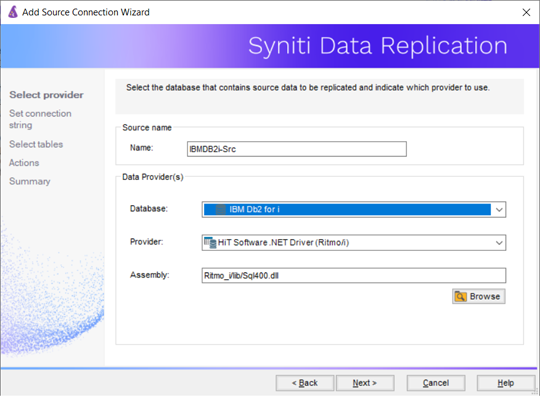
In the Add Source Connection Wizard, follow steps to add a connection string and test the connection to the database. Check the Supported Provider List in the Help Center before entering a value in the Assembly field.

-
In the Select Tables screen, choose the tables that you plan to replicate.
-
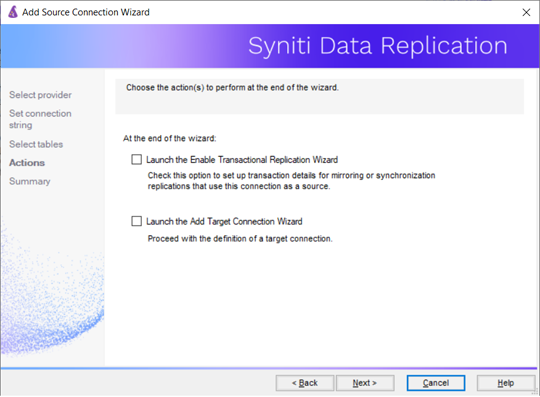
In the Actions screen, check the option Launch the Target Connection Wizard.

-
Complete the wizard.
-
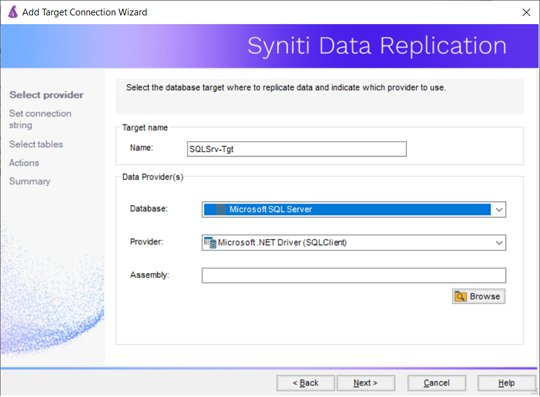
In the Target Connection Wizard, follow steps to add a connection string and test the connection to the database. Check the Supported Provider List in the Help Center before entering a value in the Assembly field.

-
Choose the tables to which you plan to replicate.
If a table does not exist, continue to the next screen without selecting a table. Create a target table once the wizard is complete. -
In the Actions screen, click Next without checking any options if you need to create a target table, or check the option Launch the Create Replication Wizard to begin creating a replication.
-
Complete the wizard.
2. Create a Target Table
If you are replicating to a database where no target table exists, you need to create the target table before defining the replication. If the target table already exists in the database to which you are replicating, go to Defining the Replication.
-
Expand the Metadata Explorer tree to display the table that contains the data you want to replicate.
-
Select the table and drag it to the target connection name to open the Create Target Table wizard.

-
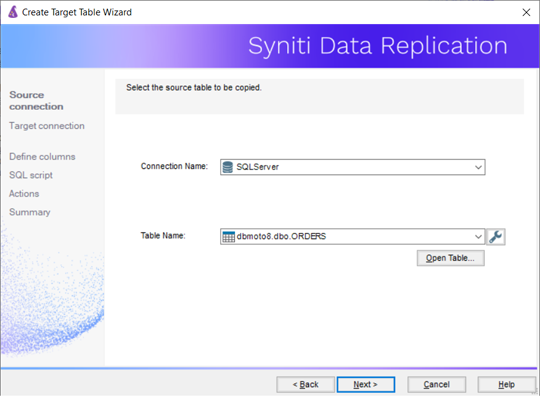
In the Select Source Connection screen, verify that the correct connection is displayed. You can modify the source connection and table names using the drop-down lists.

-
If you want more information about the table before proceeding, click Open Table....
-
Click Next to go to the Target Connection screen.

-
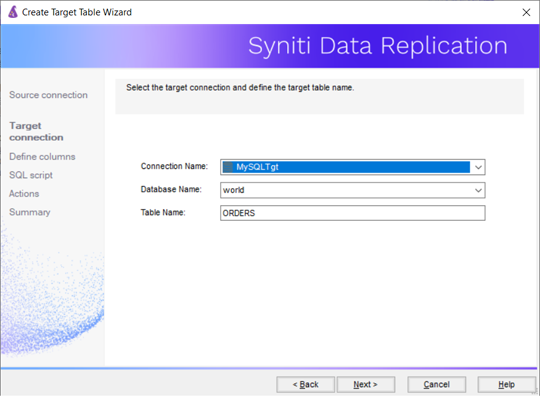
Choose a target connection name from the drop-down list that includes all the target connections you have created.
-
Select the appropriate qualifiers for your target database.
-
As needed, edit the name for the table you wish to create in the target database. This table will contain the replicated data.
-
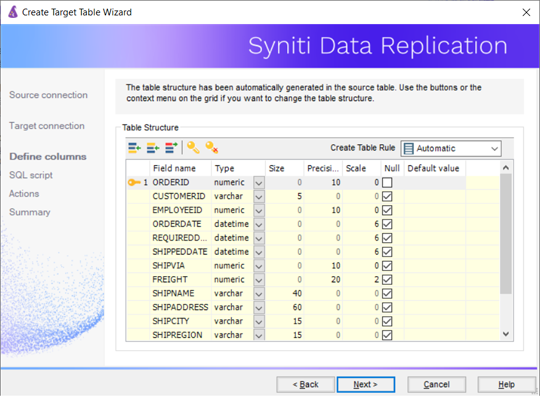
Click Next to go to the Define Columns screen.

-
Review the columns that will be created in the target table. You can add or remove columns as well as designate one or more columns as a primary key.
-
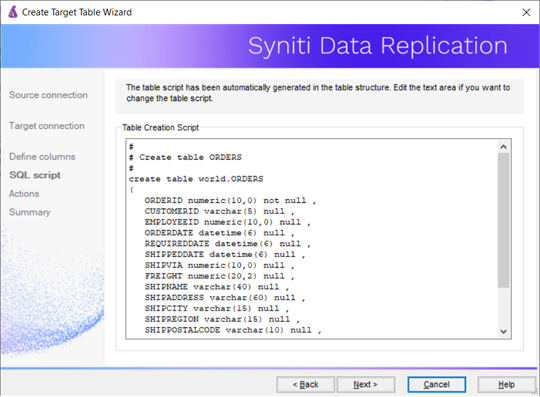
When you have finished editing the target table columns, click Next to go to the SQL Script screen.

-
If necessary, edit the SQL script that generates the table.
-
Click Next to review the wizard settings in the Summary screen.
-
To create additional tables, check the option Create another table.
This opens another Create Target Table wizard when this wizard is complete. -
To go directly to creating a replication once this wizard is complete, check the option Proceed with the Definition of a Replication.
This opens the Replication wizard when the Create Target Table wizard is complete. -
Click Finish to create the target table.
-
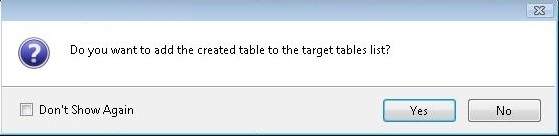
Note that the new table is not automatically displayed in the Metadata Explorer. Click Yes to add the newly created table to the list of target tables in the Metadata Explorer.

3. Define the Replication
-
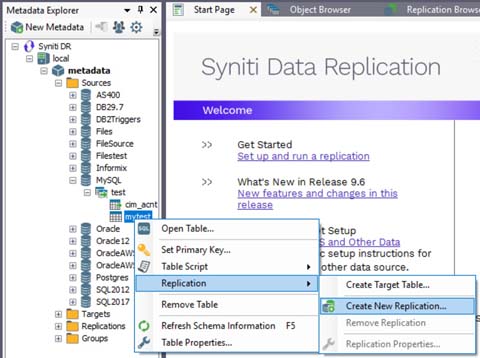
Expand the Metadata Explorer to display the table that contains the data you want to replicate.
-
Select the table.
-
From the right mouse button menu, choose Replication then Create New Replicaton....

-
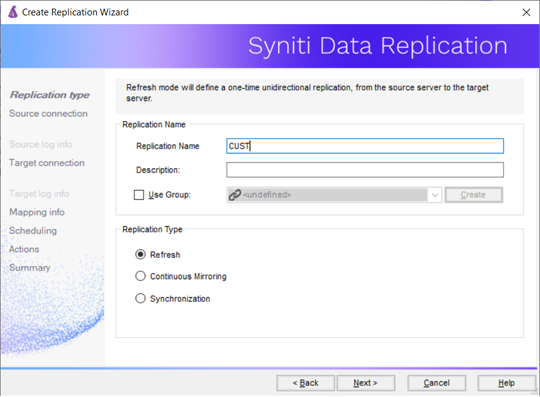
In the Define Replication Type screen, type a name to identify the replication.
-
Optionally provide a description of the replication.
-
In the Replication Mode area, choose Refresh (a once-only, one-way replication).

-
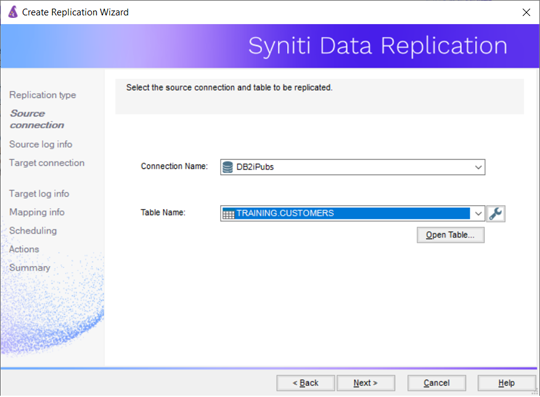
Click Next to go to the Select Source Connection screen.
-
Choose the source name from the drop-down list that includes all the source connections you have created.

-
Choose the table that you want to replicate from the drop-down list.
-
If you want more information about the table before proceeding, click Open Table....
-
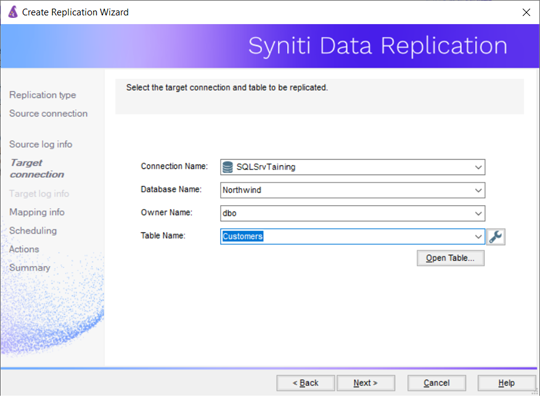
Click Next to go to the Select Target Connection screen.
-
Choose a target name from the drop-down list that includes all the target connections you have created.

-
Choose the table to which you want to replicate from the drop-down list.
If no tables are listed, you need to exit the wizard and add or create a target table. -
If you want more information about the table before proceeding, click Open Table....
-
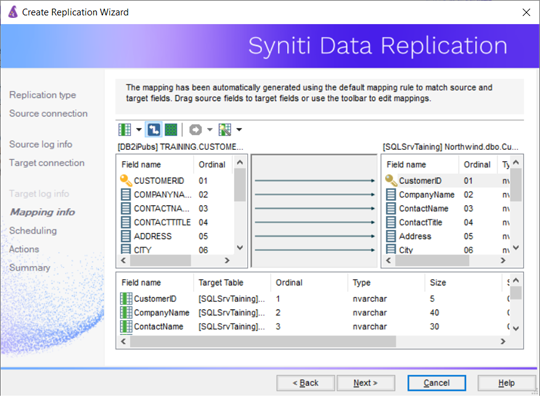
Click Next to go to the Set Mapping Info screen.

Source and target columns with the same name are automatically mapped. You can also map columns by dragging the target column and dropping it on the source column, or you can map a column to an expression. For more information about mapping, check the Replication Wizard help topic. An alternative is to write a script to set mappings at runtime. -
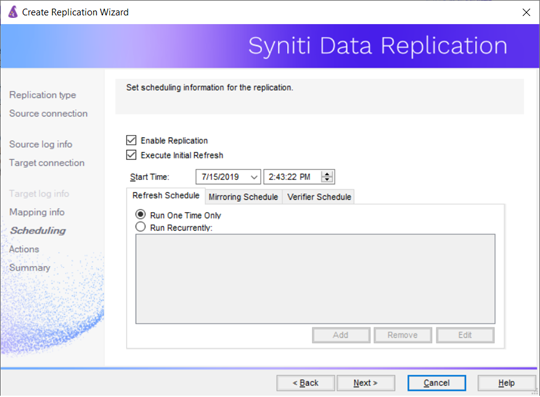
Click Next to go to the Scheduling screen.

-
Make sure the Enable Replication option is checked. This is required for the replication to run.
-
Set a start time for the replication. The Start Time field indicates the time at which the Replication Agent will begin considering the replication for execution.
-
Select how you want to run the replication:
-
Once only: the replication will run once at the time specified in Start Time.
-
Recurrently: the replication will run according to the schedule you set by clicking the Schedule button to open the Scheduler dialog.
-
-
Click Next to go to the Summary screen.
-
Click Finish to complete the wizard.
4. Run the Replication
If you installed the Replication Agent as a service during
setup, you just need to start the service using the Service Monitor
program  in the Windows Notification Area.
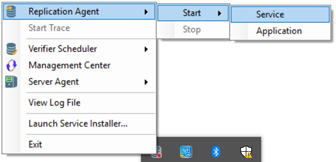
The replication that you have scheduled should start at the specified time. Use the Replication Monitor tab in the Management Center to track the progress of the replication.
If you would like to install the Replication Agent as a service:
-
From the Windows Desktop menu, choose Syniti Data Replication, then Service Installer.
-
Manage the service from the Service Monitor program (located in the Windows Notification Area
 , or on the Windows menu under Syniti Data Replication).
 -
Use the Replication Monitor tab in the Management Center to track the progress of the replication.
To run the Replication Agent interactively:
-
In the Windows Notification Area, select
the Service Monitor
icon. -
From the right mouse button menu, choose Replication Agent, then Start then Application.
The replication that you have scheduled should start at the specified time. -
Use the Replication Monitor tab in the Management Center to track the progress of the replication.